If you’ve been reading in order, then you know that I keep throwing this
“publication-quality images” phrase around.
Well, what do you know, the “Generating Images” section will actually tell you
how to make these images! Amazing.
Once you’ve gotten the the screen to look how you want the image you wanted
created to look, follow File → Render in the main menu.
This brings up the File Render Controls menu (see the image below).
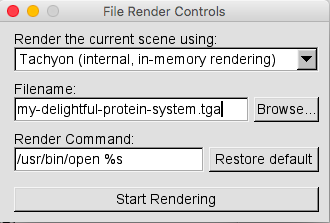
The first dropdown, Render the current scene using:, selects the
image-quality type.
If you’re just doing something super quick that’s kind of irrelevant, then it’s
fine to save the file with the default Snapshot (VMD OpenGL window).
If you’re going to want to use the image for a presentation, poster, or
publication, however, then you’ll want to select
Tachyon (internal, in-memory rendering).
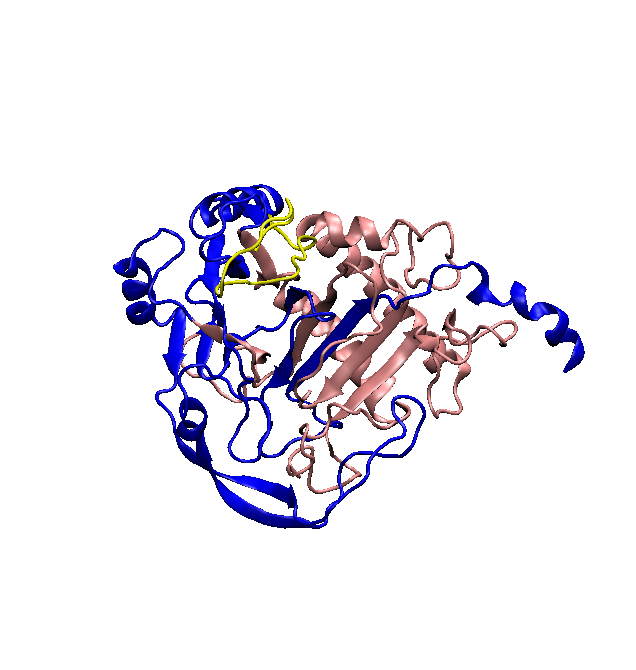
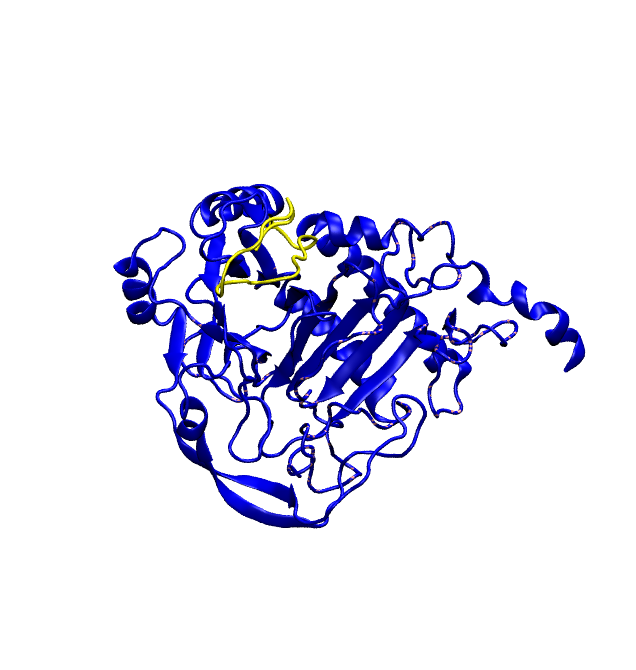
For a juxtaposition of these, see the next to figures.
(We’ll get to why the colors are different at the end of this section.)
The second dropdown is where you select the save location and the filename.
For these images, keep the .tga extension; you can convert the .tga using
Gimp or the UNIX convert command later.
The final box shouldn’t be something you have to mess with at all, as it is the
default option. Once you’re ready, hit Start Rendering.
Woohoo! You’ve saved a picture! Enjoy remaking it 73 more times because
it wasn’t good yet.
Oh, and a quick note: If you’re coloring specific sections of a protein
(like with resid 1 to 23 and resid 95 to 293), then you will need to make
sure that you don’t also have just protein selected; it’d need to be like
protein not resid 1 to 23 and not resid 95 to 293.
The reason why is because VMD cannot handle the layering in image creation,
and your picture will look terrible (just revisit the images above).
Saving a High-Quality Image with Transparency
You can also save higher-quality images in VMD (with transparency!) using POVRay. It needs to be installed separately.
The ray-tracers work well with the AO-type and diffuse materials.
Select POV-Ray in the render window.
The number version (likely 3.6) is the earliest version you can use.
For the render command, you need the +UA option to make it transparent.
The image renders using the width and height of the on-screen window.
Because you want a higher quality image, you can add a 0 after the height
and width.
It will take a bit more time (almost a full minute for a 450 residue protein),
but it looks much better than 300 DPI.
When you specify the file command, you may wish to leave off the .pov
extension.
That way, when it renders, the final image file isn’t named like .pov.tga.
- For TGA output:
povray +W%w0 +H%h0 -I%s -O%s.tga +X +A +FT +UA - For PNG output:
povray +W%w0 +H%h0 -I%s -O%s.png +X +A +FN +UA