Cloth research posters are more portable, durable, and substantially cheaper than traditional paper posters. Have you ever had to bring a poster tube on a plane? It’s a nightmarish task.
You can use Spoonflower to print cloth posters. The process that a few people have figured out work best for these are:
- Submit a poster with 300 DPI (dots per inch/pixels per inch) resolution
- Converting from a PDF to a PNG (a TIF, GIF, or minimally compressed JPG works too)
- Using the Performance Piqué fabric
- Using the Yards (56” width) size
- Use a Center repeat
Posters generated using LaTeX are already PDFs, and posters created from PowerPoint can be exported as a PDF. From a saved PDF, these files can then be converted to a higher-resolution image file using Gimp (free) or another photo-editing software, such as Photoshop®.
Using Gimp to Convert a PDF to 300 DPI
You can open the file from the command line with:
gimp name_of_file.pdf
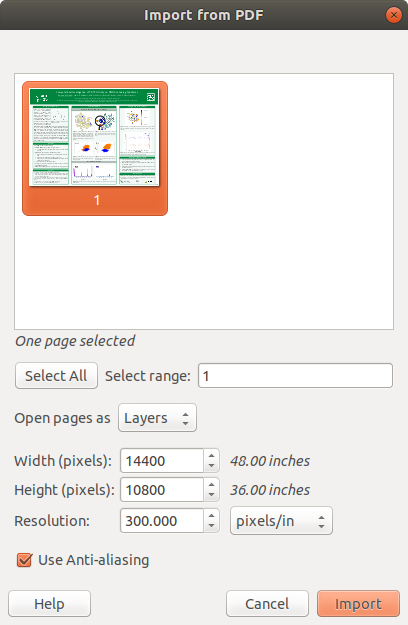
This will open the Import from PDF window. In this window, you can change the resolution from the default 100 pixels per inch to the wanted 300 pixels per inch. You want to do this so your poster is a higher-quality, and the text and images aren’t grainy or pixellated.

Once the PDF is imported, you can now export it as in image format. To do this,
follow File → Export As. I personally recommend saving as a
PNG, but any of the accepted formats is okay. Make sure to explicitly change
the file extension and the output file type.
Now that you’ve exported the image (it might be a good idea to open it up and check that everything looks right), you can upload it to Spoonflower.
Spoonflower Uploads
It is recommended that you make an account with Spoonflower for a few reasons:
- You can sometimes get discount codes
- Your past work will be saved
- It’s easier for future you
Even if you don’t make an account, you can still use Spoonflower to print your cloth poster. The top left corner has an “Upload Your Design” button. Click that button! 😃
From there, you upload your image.

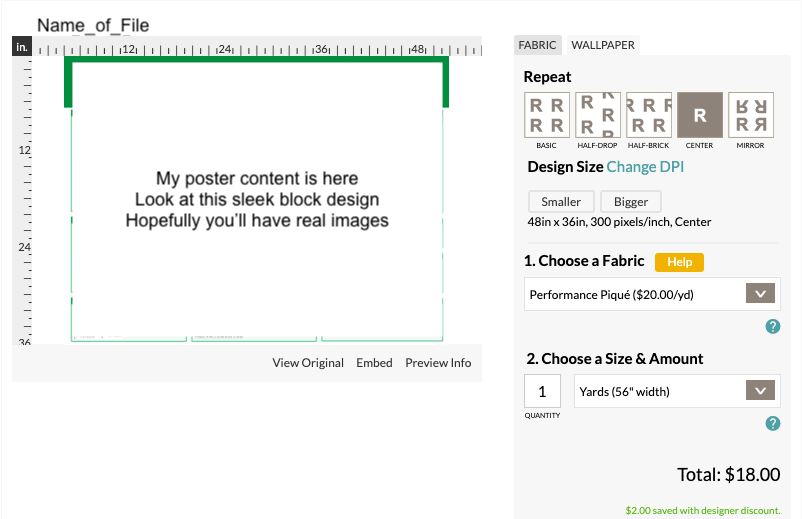
Once it is uploaded, select your fabric and click the “smaller” button until the proper poster size (likely 48x36) is shown. Choose the “Yards (56” width)” size.
Then proceed to checkout or upload more posters! Hooray! You did it!